Blog

Shrimp Pad Thai

Shrimp Pad Thai

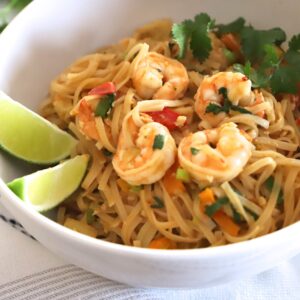
You’d never guess this healthy Shrimp Pad Thai wasn’t from your favorite takeout spot! Packed with colorful veggies, juicy shrimp, and a creamy peanut sauce, it comes together in just 30 minutes.

This vibrant recipe features wholesome brown rice noodles, tender shrimp, fluffy scrambled eggs, and crisp vegetables, all tossed in a homemade Pad Thai sauce that’s bursting with flavor.

Pad Thai has always been one of my go-to dishes, and I love this lighter version. With simple, fresh ingredients and plenty of taste, it’s the perfect quick and satisfying weeknight dinner.

How to make this Recipe:

  1. Cook noodles and make sauce

    Cook noodles according to package instructions, just until tender.  Rinse under cold water. Make sauce by combining sauce ingredients in a bowl. Set aside.

  2. Sauté vegetables and shrimp

    Heat 2 tablespoons of oil in a large saucepan over medium-high heat. Add bell peppers and zucchini. Sauté for about 3 minutes. Add the garlic and shrimp and saute unlit the shrimp begins to turn pink.

  3. Add egg, noodles, and sauce

    Push everything to the side of the pan and add the eggs. Scramble the eggs, breaking them into small pieces. Add noodles and sauce. Toss everything to combine and cook for another 2 minutes.

  4. Enjoy

    Garnish with green onions, cilantro and lime wedges.

Shrimp Pad Thai – Frequently Asked Questions:

Can I use frozen shrimp?

Yes, just thaw them completely and pat dry before cooking so they sear properly instead of steaming.

Is Pad Thai spicy?

Traditional Pad Thai is mild, but you can easily add spice with chili flakes, Sriracha, or Thai bird’s eye chilies.

Can I substitute chicken, beef, or tofu for shrimp?

Yes, Pad Thai is very versatile — you can swap shrimp for chicken, beef, tofu, or even leave out the protein for a veggie-only version.

How long does Shrimp Pad Thai last in the fridge?

Up to 2–3 days in an airtight container. Reheat in a skillet over medium heat with a splash of water or sauce to loosen noodles.

Shrimp Pad Thai

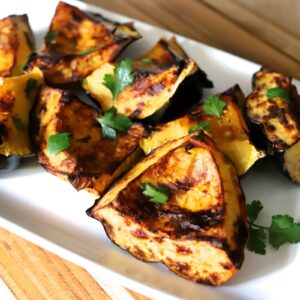
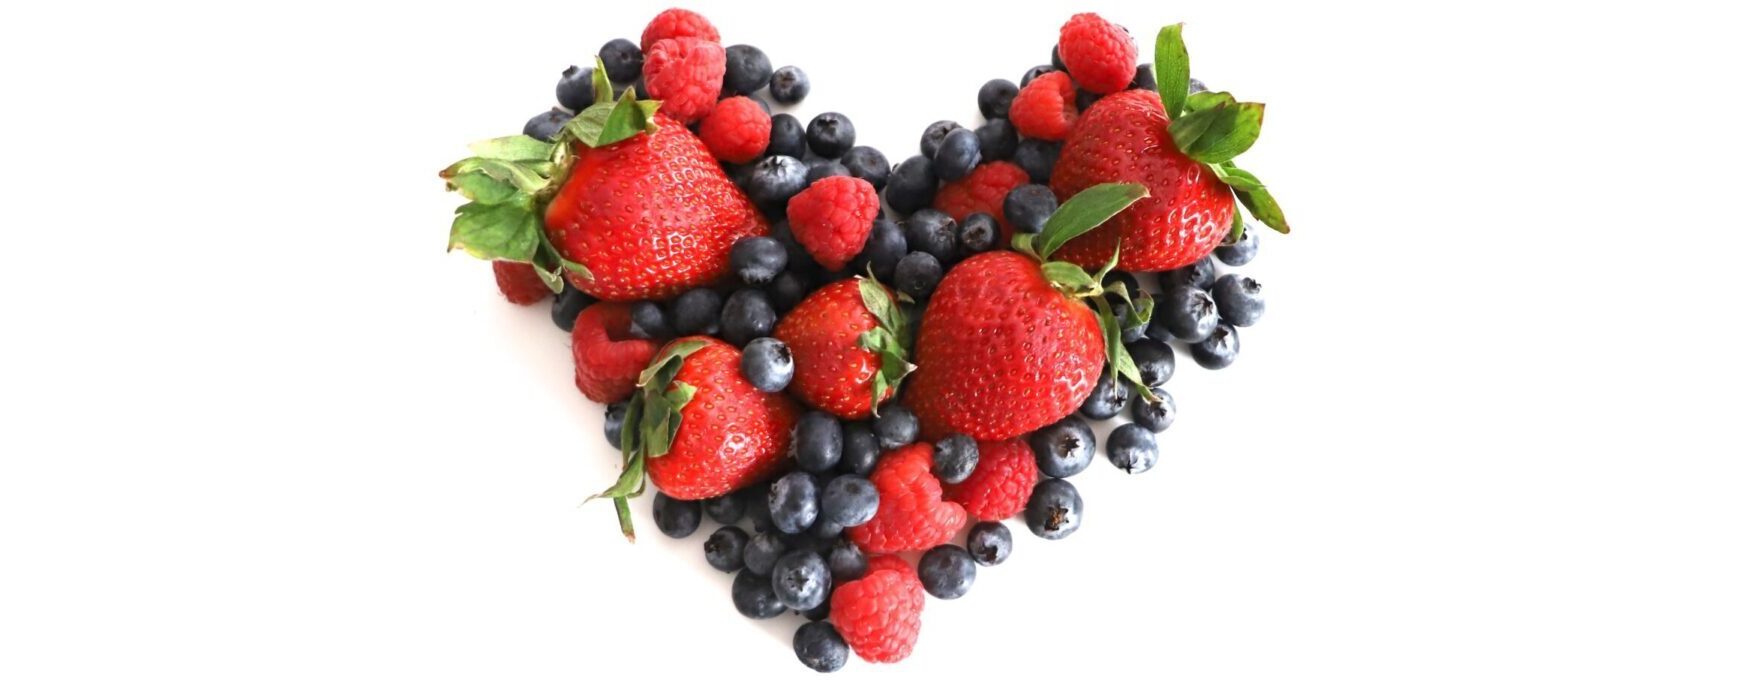
More Dinner Recipes you will Enjoy!

If you try this recipe and like it, please leave your feedback in the comment section below, and don’t forget to rate it! Please also share it with your friends and family.

Finally, please FOLLOW “She Wants To Be Good” on FACEBOOK and INSTAGRAM for all of my latest blog posts and recipes.

Shrimp Pad Thai

This recipe has simple ingredients and a lot of flavor. It’s perfect for a quick weeknight meal.
Prep Time 15 minutes
Cook Time 15 minutes
Total Time 30 minutes
Course Main Course
Cuisine Asian
Servings 5

Ingredients
  

  • 8 ounces Pat Thai brown rice noodles
  • 2 tablespoons olive oil
  • 3 cloves garlic (minced)
  • 1 pound uncooked shrimp (peeled and deveined)
  • 2 eggs (beaten)
  • 1 red bell pepper (or 1/2 red and 1/2 orange) (thinly sliced)
  • 1 medium zucchini (sliced in thin strips)
  • ½ cup cup fresh cilantro (chopped)
  • ½ cup cup fresh green onions (chopped)
  • 2 limes

Pad Thai sauce:

  • 3 tablespoons fish sauce
  • 1 tablespoon soy sauce
  • 3 tablespoons honey
  • 2 tablespoons rice vinegar
  • ½ tablespoon Sriracha hot sauce (or to taste)
  • 2 tablespoons creamy peanut butter

Instructions
 

  • Cook noodles according to package instructions, just until tender.  Rinse under cold water.
  • Make sauce by combining Pad Thai sauce ingredients in a bowl. Set aside.
  • Heat 2 tablespoons of oil in a large saucepan over medium-high heat. Add bell peppers and zucchini. Saute for about 3 minutes.
  • Add the garlic and shrimp and saute unlit the shrimp begins to turn pink.
  • Push everything to the side of the pan and add eggs. Scramble eggs, breaking them into small pieces.
  • Add noodles and sauce. Toss everything to combine and cook for another 2 minutes.
  • Garnish with green onions, cilantro and lime wedges.
Keyword best shrimp pad thai with vegetables, easy shrimp pad thai recipe, healthy pad thai, pad thai, pad thai with shrimp and vegetables recipe, pad thai with shrimp and veggies, quick shrimp pad thai recipe, shrimp, shrimp pad thai, shrimp pad thai with vegetables

Hi! I’m Irina. Here you’ll find healthy and healthy-ish recipes.

Dark Chocolate Bark with Medjool Dates

Dark Chocolate Bark with Medjool Dates

Dark Chocolate Bark with Medjool Dates is a simple, no-bake treat that’s both elegant and indulgent. Rich dark chocolate pairs beautifully with the natural sweetness and chewy texture of Medjool dates, making it a healthier twist on classic holiday candy. Perfect for gifting to friends and family, serving at festive gatherings, or enjoying as an anytime treat, this bark is quick to make yet looks impressively gourmet. You can also customize it with toppings like nuts, seeds, or a sprinkle of sea salt for extra flavor and crunch.

Medjool dates

Medjool dates have a rich, almost caramel-like taste and a soft, chewy texture. Native to Morocco, Medjool dates are just one of hundreds of varieties of dates, but they’re the only one known as “the fruit of kings.” Medjool dates are actually harvested from the date palm, cleaned, sorted and packaged right away. There’s no processing and that’s why you’ll find them in the produce section at the grocery store.

How to make this Recipe:

  1. Add layer of the Medjool dates

    Line a pan (I used a 14in X10in pan) with a parchment paper. Place a single layer of the Medjool dates on the parchment paper. Use your hands to press them down onto the pan as close together as possible.

  2. Add peanut butter

    Drizzle with peanut butter.

  3. Add almonds

    Sprinkle almonds on top.

  4. Drizzle the melted chocolate

    Then, drizzle the melted chocolate on top and use a spatula to spread out evenly.

  5. Freeze

    Freeze for about 30 minutes.

  6. Enjoy

    When the chocolate is set, break into pieces or cut with a sharp knife. Keep in the fridge for best results.

Common Questions

Can I make this ahead of time for gifting?

Yes! Dark chocolate bark keeps very well when stored properly. Wrap pieces in parchment or wax paper, then place in a tin or decorative box for a thoughtful homemade gift.

What percentage of dark chocolate works best?

Anywhere between 60% and 80% cacao works well. If you like a slightly sweeter bark, use 60–65%. For a more intense, less sweet flavor, choose 70% or higher.

Can I add other toppings besides dates?

Absolutely! Nuts (almonds, pistachios, walnuts), seeds (pumpkin, sunflower), dried fruit, shredded coconut, or even a sprinkle of flaky sea salt complement the chocolate and dates.

How should I store dark chocolate bark?

Store it in an airtight container in a cool, dry place for up to 1 week. For longer storage, keep it in the refrigerator for up to 2–3 weeks, or freeze for up to 3 months.

Dark Chocolate Bark with Medjool Dates

More Dessert Recipes you will Enjoy!

If you try this recipe and like it, please leave your feedback in the comment section below, and don’t forget to rate it! Please also share it with your friends and family.

Finally, please FOLLOW “She Wants To Be Good” on FACEBOOK and INSTAGRAM for all of my latest blog posts and recipes.

Dark Chocolate Bark with Medjool Dates

Dark Chocolate Bark with Medjool Dates is the perfect quick-fix snack or dessert. It is the perfect healthy dessert to keep in your fridge!
Prep Time 45 minutes
Cook Time 0 minutes
Total Time 45 minutes
Course Dessert
Cuisine American
Servings 15

Ingredients
  

  • 12 ounces Medjool dates (pitted and roughly chopped)
  • ½ cup peanut butter (warmed)
  • ½ cup almonds (chopped)
  • ¾ cup dark chocolate (melted)

Instructions
 

  • Line a pan (I used a 14in X10in pan) with a parchment paper.
  • Place a single layer of the Medjool dates on the parchment paper. Use your hands to press them down onto the pan as close together as possible.
  • Drizzle with peanut butter and sprinkle almonds on top. Then, drizzle the melted chocolate on top and use a spatula to spread out evenly.
  • Freeze for about 30 minutes.
  • When the chocolate is set, break into pieces or cut with a sharp knife. Keep in the fridge for best results.
Keyword dark chocolate, dark chocolate bark, dark chocolate medjool dates dessert, dessert, easy chocolate bark with dates, healthy dark chocolate bark recipe, medjool dates, medjool dates and chocolate bark, medjool dates bark

Hi! I’m Irina. Here you’ll find healthy and healthy-ish recipes.

Air Fryer Acorn Squash

Air Fryer Acorn Squash

Air Fryer Acorn Squash is an easy, healthy, and flavorful side dish that comes together with minimal effort. When cooked in the air fryer, the squash develops a naturally sweet, nutty flavor with a perfectly caramelized exterior and a soft, creamy texture inside. Plus, it pairs beautifully with both savory seasonings like garlic and herbs or sweet toppings such as cinnamon and maple syrup.

Ingredients

To make this recipe, you will need the following ingredients: acorn squash, olive oil, salt, and pure maple syrup or honey (optional).

I love acorn squash and it’s perfect for fall evenings. Acorn squash is a type of winter squash known for its distinctive shape and sweet, nutty flavor. It belongs to the gourd family, which includes other popular squashes like butternut squash, pumpkin, and zucchini. There are many ways to enjoy acorn squash: air fried acorn squash, roasted acorn squash, stuffed acorn squash, mashed acorn squash, or acorn squash soup.

Acorn Squash

How to make this Recipe:

  1. Prepare

    Wash the acorn squash. With a sharp knife, cut the acorn squash in half. Use a spoon to scoop out and discard the seeds. Then, cut each half into four close in size pieces. Place the acorn squash side down into the basket of the air fryer.

  2. Cook

    Air fry at 330 degrees F for 20 minutes (preheat first, if your air fryer requires preheating). Remove the squash, oil the insides of the squash, and sprinkle lightly with salt. Place the squash, cut side up, back into the air fryer basket.  Air fry at 400 degrees F for about 10 minutes more, or until the cut surface is browned and the inside of the squash is fork tender. 

  3. Enjoy

    Optionally, drizzle with pure maple syrup. And serve.

Air Fryer Acorn Squash – Frequently Asked Questions:

Do I need to peel the squash before air frying?

No, the peel becomes soft during cooking and is edible, though many people prefer to scoop out the flesh. Leaving the skin on helps the squash hold its shape.

How do I know when acorn squash is done?

The squash should be fork-tender and slightly caramelized on the edges. You should be able to pierce the flesh easily with a fork.

Can I season it in different ways?

Yes! Acorn squash pairs well with both savory flavors (garlic, rosemary, paprika, parmesan) and sweet flavors (maple syrup, cinnamon, brown sugar, nutmeg). You can even mix sweet and savory for a more complex taste.

What can I serve with air fryer acorn squash?

It pairs beautifully with roasted meats, poultry, fish, grain bowls, or salads. Sweet versions also work well with holiday meals like Thanksgiving or Christmas dinner.

Air Fryer Acorn Squash

More Side Recipes you will Enjoy!

If you try this recipe and like it, please leave your feedback in the comment section below, and don’t forget to rate it! Please also share it with your friends and family.

Finally, please FOLLOW “She Wants To Be Good” on FACEBOOK and INSTAGRAM for all of my latest blog posts and recipes.

Air Fryer Acorn Squash

Air Fryer Acorn Squash is so easy to make and delicious. It a healthy delicious side dish or snack that comes out tender and flavorful in no time at all.
Prep Time 5 minutes
Cook Time 35 minutes
Total Time 40 minutes
Course Side Dish
Cuisine American
Servings 8

Ingredients
  

  • 1 whole acorn squash
  • 2 teaspoons olive oil
  • ¼ teaspoon salt
  • 2 tablespoons pure maple syrup (optional)

Instructions
 

  • Wash the acorn squash. With a sharp knife, cut the acorn squash in half. Use a spoon to scoop out and discard the seeds. Then, cut each half into four close in size pieces.
  • Place the acorn squash side down into the basket of the air fryer. Air fry at 330 degrees F for 20 minutes (preheat first, if your air fryer requires preheating).
  • Remove the squash, oil the insides of the squash, and sprinkle lightly with salt. 
  • Place the squash, cut side up, back into the air fryer basket. 
  • Air fry at 400 degrees F for about 10 minutes more, or until the cut surface is browned and the inside of the squash is fork tender. 
  • Optionally, drizzle with pure maple syrup. And serve. 
Keyword acorn squash, acorn squash air fryer, acorn squash in air fryer, air fryer acorn squash, roasted acorn squash

Hi! I’m Irina. Here you’ll find healthy and healthy-ish recipes.